Taking your first steps into airbrushing can be a daunting prospect. With all of the new terminology, different types of airbrushes and power sources, and a completely different way of painting with all new techniques can be confusing. Here I will try to break it all down in a way that is easy to understand so that you can make the best choice for you. At the end I will give you my recommendations.
Internal-Mix or External-Mix
This describes how the air and paint is mixed.
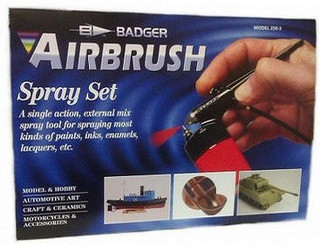
External Mix: External mix airbrushes combine the air and paint outside the main body of the airbrush, they are very easy to clean and maintain. This type, often called a spray gun, is perfect for spraying large areas similar to using aerosol cans. The advantage these have over aerosols is that you can use any colour of paint you choose, rather than being limited to the range of colours available in spray cans. You can also power these using an air compressor. The Badger Model 250 Spray Gun Set is an external mix airbrush with a set spray width. Other external mix airbrushes, such as the Badger Model 350 Versatile Airbrush, have an adjustable paint nozzle to achieve a limited range of spray widths.
Internal-Mix: The internal mix airbrushes mix the paint and air within the body of the airbrush before it leaves the nozzle. This produces finer atomisation of the paint, meaning smaller droplets, which will give you the smoothest finish. Internal-mix airbrushes are offered in a wide range of configurations, with different control methods, paint feeds, and needle/nozzle set-ups. Internal-mix airbrushes are more mechanically complex and so require more maintenance than external-mix airbrushes.
Single-Action or Double-Action
This describes how the paint and airflow is controlled.
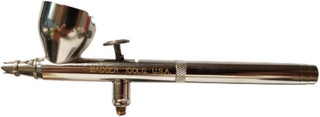
Single-Action: With single action airbrushes, such as the Badger Model 200 Precision Airbrush, pressing on the trigger controls only the airflow. The further the trigger is pressed, the more air is allowed to flow through, which pulls through more paint, and so giving you thicker coverage. The needle position, which controls the size of the spray area, is adjusted by turning a dial at the end of the airbrush body opposite the nozzle. Turning this dial adjusts how closely the needle is settled into the nozzle. As the needle is moved back, the angle at which the mixed air and paint can flow through the nozzle is increased, giving you a wider spray area. External-mix airbrushes all use single-action control.
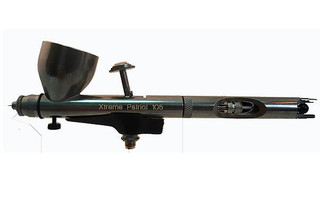
Double-Action: In a double-action airbrush, such as the popular Badger Model 100 Gravity Feed Medium Airbrush, the trigger is used to control both the airflow and needle position. Pressing the trigger down controls the airflow in the same way as with single-action airbrushes. What makes double action different is that instead of turning a dial to adjust the needle position, this is done by moving the trigger back and forwards. A double action airbrush can be harder to learn, however once mastered a stunning range of effects can be produced, such as the mottling effect on WW2 Luftwaffe model kits. More experienced modellers will generally use a double action airbrush.

Propellant Cans or Air Compressor
You have options on how to provide the air to your airbrush by either propellant cans or air compressors.
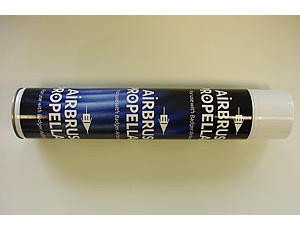
Propellant Cans: For most scale modellers starting out using spray guns, especially when using them infrequently, the compressed air can will be the first choice. Propellant cans have the advantages of being small, quiet, and cheap. As the gas is released the can gets very cold, which drops the pressure, and the pressure also drops steadily as the propellant remaining in the can is used. It is common for those who use propellant cans to have several in a bucket of warm water and switch between them when they get cold. Also, the gas used in these cans is a mix of propane and butane so is highly flammable and must be used in a well ventilated area. Badger provides a large size propellant can that will suffice for a few model builds. Propellant cans save you the initial cost of getting a compressor when you are just getting started, however if you really take to using the airbrush over time it will be more economical to invest in an air compressor.
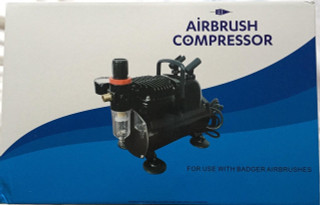
Air Compressors: With an air compressor you won't have to repeatedly buy replacement cans, you don't have to worry about the gas as it just pumps the surrounding air, and the pressure won't drop off as you are using it. There are two main types of compressors; simple diaphragm compressors such as that included in the Revell Basic Airbrush with Compressor set, and piston compressors such as the Badger Air Compressor.
Diaphragm compressors are small, cheap and simple, but have a noticeable pulse in the airflow and do not have a moisture trap to catch the water created when air is compressed. They are also constantly working when turned on and have a relatively short lifespan compared to piston compressors.
Piston compressors are larger, are well engineered and usually last for decades without any maintenance, and provide a more consistent pressure. All of the piston compressors that we stock include a moisture trap and most also include a pressure regulator to give you complete control over the pressure of the airflow. These compressors also stop once the set pressure is achieved and only start to pump once the pressure drops while you are spraying. Larger piston compressors incorporate an additional reservoir tank, which removes any slight pulsing from the piston movement as the piston feeds air into this tank and then the tank provides the air to the airbrush, as is the case with the Badger Air Compressor with Air Tank.


Recommendations
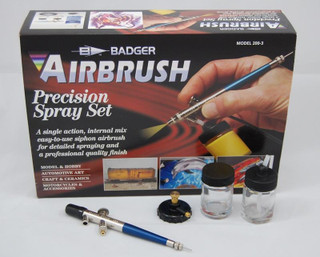
The airbrush I most recommend for anyone starting out is the Badger Model 200 Precision Spray Set. This set features a good quality internal-mix, double-action, siphon-feed airbrush that also has the option of a gravity feed with the addition of the Badger Colour Cup. The set includes a propellant can to get you started as well as a vinyl hose and propellant can regulator to connect it all up. This airbrush has been designed to allow you to obtain a wide range of spray widths from 50mm down to just 1.6mm. You also have the option of upgrading to using a compressor at a later date.
If you are spraying large areas of a single colour, such as on model car and truck bodies, then I would recommend the Badger Model 250 Spray Gun Set. This simple spray gun is ideal for this kind of work.
If you want to jump in at the deep end, or are upgrading, I would recommend choosing from one of the Badger Model 100 range of airbrushes, such as the Model 100 Gravity Feed Medium Airbrush, and the Badger Air Compressor with Air Tank, as well as a 6-foot Braided Hose to connect them.
Another option for those just starting out is the Revell Basic Airbrush with Compressor. This set is popular as it includes both an airbrush and a compressor in a handy case. The compressor is of the diaphragm type, and the airbrush is an internal-mix, single-action, gravity-feed airbrush. Unlike other single-action airbrushes the needle position is controlled by the trigger in the same way as on double-action airbrushes, and the pressure of the air flow is determined by three settings on the compressor with depressing the trigger acting as an on-off switch for the airflow. This set uses push-fit connections rather than standard airbrush fittings so is not compatible with other more advanced airbrushes and compressors.